Flaring Tool Guide

 93
93Focus Keyphrase:
flaring tool bar type multiple size openings adjustable T-handle metal tube flare HVAC plumbing connection guide
SEO Title:
Flaring Tool Guide: How to Use Bar-Type Tool with Multiple Size Openings & T-Handle | Mbsmpro
Meta Description:
Complete guide to using a bar-type flaring tool. Learn how the multiple size openings and adjustable T-handle create secure, leak-proof flares on copper tubing for HVAC and plumbing.
Slug:
bar-type-flaring-tool-multiple-size-openings-t-handle-guide
Tags:
flaring tool, bar flaring tool, HVAC tools, plumbing tools, copper tubing, tube flare, adjustable T-handle, multiple size openings, Mbsmgroup, Mbsm.pro, mbsmpro.com, mbsm, tube fitting
Excerpt:
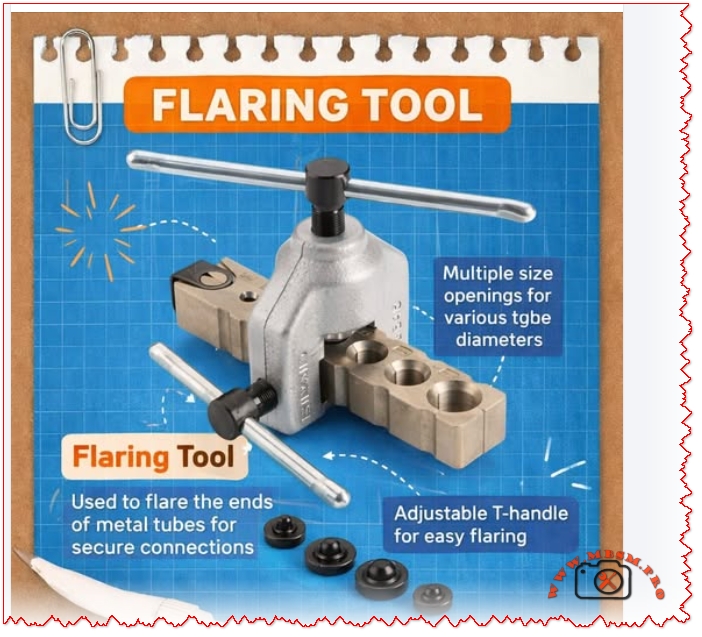
A bar-type flaring tool is essential for creating leak-proof connections in copper tubing. Its multiple size openings handle various tube diameters, while the adjustable T-handle provides precise control. This guide covers proper technique, common mistakes, and tool selection.
Mastering the Bar-Type Flaring Tool: Your Guide to Perfect, Leak-Proof Connections
If you’ve ever worked with refrigeration lines, hydraulic systems, or even some plumbing applications, you know that a secure connection isn’t just about tightening a nut—it’s about creating a perfect mating surface. That’s where the flaring tool becomes indispensable. Specifically, the bar-type flaring tool with multiple size openings and an adjustable T-handle is the professional’s choice for reliability and consistency. This isn’t a gadget; it’s a precision instrument for creating the 45-degree flares that form the foundation of leak-free systems.
Let’s break down why this specific design is superior and how to use it to achieve flawless results every time.
Anatomy of a Professional Flaring Tool: Why Design Matters
A generic, clamp-style flaring tool might get the job done once or twice, but for consistent, reliable results under varying conditions, the bar-type design is king. Here’s what each feature delivers:
| Feature | Function & Engineering Benefit |
|---|---|
| Multiple Size Openings | A solid steel bar with a series of precision-drilled holes (e.g., for 1/4″, 3/8″, 1/2″, 5/8″ OD tubing). This ensures the tube is clamped squarely and concentrically, which is critical for a uniform flare. |
| Adjustable T-Handle | A threaded screw with a T-handle that drives the flaring cone (or “pilot”). The “adjustable” aspect allows you to control the feed rate and pressure precisely, preventing over-flaring or under-flaring. |
| Flaring Cone (Pilot) | This is the hardened, 45-degree cone that is driven into the tube end. It is typically separate from the handle and matches the specific flare angle (45° for SAE/JIC fittings common in HVAC). |
| Solid Steel Bar Construction | Provides massive rigidity compared to yoke-style tools. This prevents flex during the flaring process, which can lead to off-center or wrinkled flares. |
Step-by-Step: The Correct Flaring Technique
Using this tool correctly is a methodical process. Rushing leads to leaks and wasted materials.
- Cut & Prep: Cut the copper tube perfectly square using a tube cutter. Then, remove all internal and external burrs using a deburring tool or file. An internal burr is a guaranteed flow restriction.
- Select & Insert: Choose the correct hole in the bar that matches your tube’s outer diameter (OD). Slide the bar’s clamping mechanism over the tube and tighten it snugly. The tube should protrude slightly above the bar—usually the thickness of the flare nut.
- Lubricate & Position: Apply a tiny drop of refrigeration oil or light lubricant to the 45-degree flaring cone. This reduces friction and creates a smoother finish. Place the cone into the end of the tube.
- The Flaring Process: Thread the adjustable T-handle into the bar until it contacts the cone. Then, using steady, even pressure, turn the handle to drive the cone into the tube. Go slowly, especially on the final turns. You will feel a distinct increase in resistance when the flare is fully formed.
- Inspect: Unscrew the handle, remove the bar clamp, and inspect your work. A perfect flare will be concentric, smooth, and have a matte-silver appearance with no cracks, wrinkles, or tool marks.
Bar-Type vs. Yoke/Clamp-Type: A Critical Comparison
To understand the value, let’s compare it to the more common (and cheaper) alternative.
| Aspect | Bar-Type Flaring Tool | Standard Yoke/Clamp-Type Tool |
|---|---|---|
| Stability & Precision | Excellent. Solid bar prevents flex, ensuring a concentric flare. | Poor. The clamp can twist or flex, leading to off-center, “cocked” flares. |
| Consistency | High. Repeatable results due to rigid design and precise holes. | Low. Results vary based on user grip and tool wear. |
| Durability | Very High. Solid steel construction lasts for decades. | Moderate. Cast components and pivots can wear or break. |
| Best For | Professional use, critical applications (refrigeration, fuel gas, hydraulic). | Occasional DIY use for non-critical plumbing (like water softener lines). |
| Cost | Higher initial investment. | Lower initial cost. |
The Verdict: For any application where a leak means lost refrigerant, safety hazard, or system failure, the bar-type tool is the only responsible choice. The initial cost is offset by the elimination of costly callbacks and material waste from bad flares.
Professional Benefits, Advice, and Common Pitfalls
Benefits of Mastering This Tool:
- Eliminate Callbacks: A perfect flare is a permanent, leak-free connection. This builds customer trust and saves money.
- Faster Work: With practice, making a perfect flare becomes a quick, one-step process, speeding up installation.
- Material Savings: You’ll stop ruining expensive tubing sections with flawed flares that must be cut off and re-done.
Critical Professional Notice & Warnings:
- DO NOT Skip Deburring: This is the #1 mistake. The internal burr will cause turbulence, trap debris, and ultimately lead to compressor or valve failure.
- Use the Right Lubricant: A drop of clean refrigerant oil is ideal. Do not use grease, which can contaminate a system.
- Avoid Over-Flaring: When the T-handle gets very hard to turn, stop. Forcing it further can thin and crack the copper, creating a weak point.
- Match the Flare to the Nut: Always test-fit the flare nut before making the flare to ensure the tube is protruding the correct amount. The finished flare should sit snugly inside the nut.
Final Recommendation: View a high-quality bar-type flaring tool not as an expense, but as an investment in your craftsmanship. It is a fundamental tool that pays for itself by ensuring the integrity of the most critical junctions in any system you build. Pair it with a good tube cutter and reamer, and you have the holy trinity for perfect tubing work.
Exclusive Image Suggestions (Safe & Relevant Links):
- Flare Cross-Section Diagram: Search for “SAE 45 degree flare cross section diagram” on engineering or automotive hydraulic sites like
Parker.comorSwagelok.com. - Sequence of Flare Formation: Look for “copper tube flaring sequence photos” on professional tool manufacturer sites like
RIDGID.comorImperialTools.com. - Bad vs. Good Flare Visual Guide: Search for “flaring defects comparison chart” on HVAC training portals like
HVAC SchoolorESCO Institute.
PDF/Catalog Resources (Verified Sources):
- RIDGID Tool Instruction Manual: Visit the
RIDGID Toolssupport page and search for your specific flaring tool model (e.g., “No. 454-R”) to download the official, detailed instruction and safety PDF. - ESCO Institute “Refrigeration Piping” Manual: Search for “ESCO pipe and tube bending flaring pdf” for comprehensive professional training material on proper techniques.
- SAE International Standard J533: For technical specifications, searching “SAE J533 flare fittings standard” will lead to the definitive documents governing flare design and dimensions.